Monday, November 1, 2010

Baked Doughnuts

I love doghnuts. Love love love them. And I really enjoy making them so that their uber-fresh goodness can right right from the cooling rack to my hand to my open and anxiously awaiting mouth. The only downside to doughnuts is that, in most cases, you fry them. That makes my love nest smell gross. That's why these baked doughnuts are a no-smelliness, healthier alternative to the traditional fried dough.


And....these babies are absolute pillows to bite into. They are so, so soft.


Ingredients:

1 1/3 cups warm milk, 95 to 105 degrees (divided)

1 packet active dry yeast (2 1/4 teaspoons)

2 tablespoons butter

2/3 cup sugar

2 eggs

5 cups all-purpose flour

a pinch or two of nutmeg

1 teaspoon salt


For the Cinnamon Sugar:
1/2 cup unsalted butter, melted

1 1/2 cups sugar

1 tablespoon cinnamon


Method:

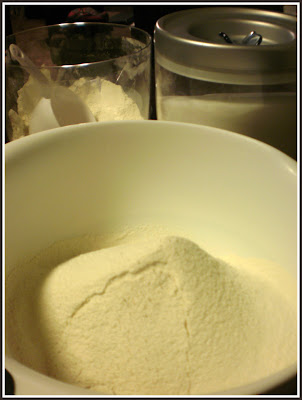
Place 1/3 cup of the warm milk in the bowl of an electric mixer. Stir in the yeast and set aside for five minutes or so. Be sure your milk isn't too hot or it will kill the yeast. Stir the butter and sugar into the remaining cup of warm milk and add it to the yeast mixture. With a fork, stir in the eggs, flour, nutmeg, and salt - just until the flour is incorporated. With the dough hook attachment of your mixer beat the dough for a few minutes at medium speed. This is where you are going to need to make adjustments - if your dough is overly sticky, add flour a few tablespoons at a time. Too dry? Add more milk a bit at a time. You want the dough to pull away from the sides of the mixing bowl and eventually become supple and smooth. Turn it out onto a floured counter-top, knead a few times (the dough should be barely sticky), and shape into a ball.
Transfer the dough to a buttered (or oiled) bowl, cover, put in a warm place (I turn on the oven at this point and set the bowl on top), and let rise for an hour or until the dough has roughly doubled in size.
Punch down the dough and roll it out 1/2-inch thick on your floured countertop. Most people (like myself) don't have a doughnut cutter, instead I use a 2-3 inch cookie cutter to stamp out circles. Transfer the circles to a parchment-lined baking sheet and stamp out the smaller inner circles using a smaller cutter. If you cut the inner holes out any earlier, they become distorted when you attempt to move them. Cover with a clean cloth and let rise for another 45 minutes.
Bake in a 375 degree oven until the bottoms are just golden, 8 to 10 minutes - start checking around 8. While the doughnuts are baking, place the butter in a medium bowl. Place the sugar and cinnamon in a separate bowl.
Remove the doughnuts from the oven and let cool for just a minute or two. Dip each one in the melted butter and a quick toss in the sugar bowl. Eat immediately if not sooner.
Makes 1 1/2 - 2 dozen medium doughnuts.


Friday, October 29, 2010

Pumpkin Spice Oatmeal


Pumpkin Spice Oatmeal:

1/2 C. quick oats (or old fashioned, I prefer quick oats myself)
1 C. water
3 Tbsp pumpkin puree
1/4 tsp apple pie spice
sugar (as much, or little, as you'd like)
hazelnut coffee creamer, optional

Method:

Basically all you're doing here is making oatmeal. Nothing fancy. Microwave your oatmeal and water for one mintue, take it out, stir in the pumpkin puree and spice, then finish microwaving (about one minute more).


Swirl in the sugar and coffee creamer, and even more spice if you'd like, then simply enjoy it's simplicity.


Winner Winner Chicken Dinner

This was my first time roasting chicken legs, but I knew they would roast better than chicken breasts and I was really in the mood to roast something (maybe just so I could scarf the accompanying vegetable, roasted carrots.....mmmm yummy!).

Roasted Tarragon and Garlic Chicken,
with carrots and mashed potatoes

For the roast chicken and carrots:
4 chicken legs
4 cloves garlic, finely minced
1 tsp olive oil
1/3 C chopped fresh tarragon
1/2 yellow onion, medium-sized
1 lb carrots, peeled and cut into equal-sized pieces
1 (14oz) can chicken stock, with 2-3 chicken boullin cubes dissolved into the stock
salt and pepper to taste

For the potatoes:
10 potatoes, washed,peeled, and quartered
4 Tbsp butter
milk
garlic salt, salt, and pepper to taste

For the gravy:
chicken drippings
3 Tbsp flour
salt and pepper, if needed, to taste

Method:

Heat oven to 350 degrees F
Trim excess fat. Rinse the chicken legs and pat them dry with a paper towel. Be sure they are dry! Wet skin=yucky wilty, not crispy skin. Run your fingers under the skin on each chicken leg to create a pocket, this is where you will stuff in the herbs.

Grate the 1/2 onion. Mix with tarragon. Heat the olive oil in a pan, saute the minced garlic until softened and fragrant, let it cool a bit, then add it to the onion and tarragon. Stuff the herb mixture into the pocket you made earlier on the chicken legs. Season the skin with salt and pepper and pat some of the herb mixture on top.

Place in a roasting pan with the prepared carrots. Roast 15 minutes, then pour in the chicken stock. Continue roasting 10-15 minutes more, until internal temperature is about 165 degrees F and the juices run clear.

Meanwhile, put the potatoes in large pot, cover with water, add some salt, then put on the stove and bring the water to a boil. When the potatoes are done, a fork will slide through them easily (about 10 minutes). Drain the water. I like to put the potatoes back in the pot, then mash them, then add the butter and milk till they are smooth and creamy. I season with salt, garlic salt, and a bit of pepper. Then I put a lid over them and keep them on the stove (heat off) to keep them warm. When it's time to serve, they may need more milk to make them creamy again.

Once the chicken is done, pull out the legs, put on a plate, cover with foil, and let them rest while you make the gravy. Remove the carrots from the pan, and cover those as well. If you are cool like me and roasted your chicken in a stainless steel roasting pan (or if you used a dutch oven roasting pot), you can make your gravy on the stove. Super cinch.

Just turn the burner on to medium, add the flour, one tablespoon at a time, whisking after each addition. Then watch your gravy thicken and oila!! Gravy is ready. (If you want to be finicky, you could strain the juices prior to adding the flour, but I LOVE the tarragon and garlic and in my gravy. So I don't.)

Plate up and enjoy!


Wednesday, October 27, 2010

Snookums Snickerdoodles

I think "snickerdoodles" is just one of the most fun words for my mouth. I have a bunch of words that I love to say, like snoochums, snickerdoodles, muffin, ma cherie (which might be more of an expression), sushi, supercalafredjulisticexpealadocious, and many more which might actually be better than these, but when I put myself on the spot, I just can't remember them all.


What I can remember is that these cookies are T-A-S-T-Y tasty. I love snickerdoodles. And I like my snickerdoodles fat and soft, pillowy even. I'm not one for those thin, crispy ones. If you're like me you're gonna want to try these little babies.

They're in need of some tweaking, next I'm going to try making them with butter instead of shortening and with a little less cream of tartar, but I thought I'd share the unmarred recipe and then you will be free to try them yourself, or wait and see if I can make them better. The choice is yours.

Ingredients
1 cup shortening
1 1/2 cups white sugar
2 eggs
2 3/4 cups sifted all-purpose flour
1 teaspoon baking soda
2 teaspoons cream of tartar
1/4 teaspoon salt
2 tablespoons white sugar
2 teaspoons ground cinnamon


Method
Preheat oven to 400 degrees F (200 degrees C).

In a large bowl, mix together the shortening and 1 1/2 cups of white sugar until smooth. Stir in the eggs one at a time, blending well after each. Combine the flour, baking soda, cream of tartar and salt; stir into the batter until blended.
Roll the dough into balls the size of small walnuts. Roll in a mixture of 2 tablespoons sugar and 2 teaspoons cinnamon. Place 2 inches apart on an ungreased cookie sheet.
Bake in the preheated oven for 8 to 10 minutes or until lightly browned, but still soft.


One side note: I was a bit startled by the dryness of the dough. When I try this recipe again, I think I might decrease the flour by a smidge, but not much. I figured that the dough was wet enough for the cinnamon sugar to stick to it, but not so wet that the sugar melted and burned during baking. That is a good thing. Trust me, no one really likes that burnt sugar flavor.

And another one: cook these 8 minutes...no more!! Possibly 7 minutes. I tried various times and anything over 8 minutes equals one hard cookie after it cools. Not cool. :)


**Amendment!!! 10/18/2010**
I tried this recipe again, but I only used 1/2 tsp cream of tartar instead of 2 tsp and 1 cup butter instead of 1 cup shortening.
Results: USE 1/2 tsp cream of tartar unless you like tart cookies!! 1/2 tsp = perfect. 2 tsp=WAYYYYY too much.
As for the butter, it made my cookies more flat, but still very soft. So they were tasty, just not pillows like I like 'em. So I think I'll stick the shortening 'cause goodness know I love me some pillowy cookies.

Mango Salsa

Mango Salsa


This is lovely on top of fish or with grilled shrimp, but also quite delicious with tortilla chips. Oh and we also ate it with pulled beef tacos and, well, that was scrumptious too. The jicama gives the salsa a satisfying crunch and adds texture, but you could use a seedless English cucumber instead.


Ingredients:

2 mangoes, peeled and seed removed

½ small pineapple, skin removed and cored

½ small jicama, peeled

2 roma tomatoes

2 green onions

1 large orange

1 small jalapeno

1 avocado

¼ tsp garlic salt

¼ cup chopped cilantro

½ lime

Dice the mangoes, pineapple, jicama, and finely dice the green onions and put in medium bowl.

Cut roma tomatoes in half, remove the seeds and juicy stuff, then finely dice those as well and add them to the bowl.

Remove the peel and pith of the orange by cutting it away with a knife (cut off the top and bottom of the orange, then, starting at the top and working towards the bottom, cut away slices of the peel making sure to remove all white stuff (the pith)). Section out the orange, cut each section in half and put in bowl. Squeeze the section-less orange for about 1-2 Tbsp of juice.

Next, seed the jalapeno, and if you’re a wimp like me, remove the membrane as well. Very finely dice the jalapeno and depending on how much heat you like, use one half to the whole thing (I only used half).

Add the cilantro the bowl.

In a small bowl, mash the avocado and season it with ¼ tsp garlic salt, then add to the salsa and mix all of the ingredients until well distributed.

Squeeze in ½ lime, give one final mix and….enjoy!


PS- I made this up all by myself :)


Basic Addition

What do you get when you combine giant, ripe strawberries

{strawberries, large ones}

with luscious dark chocolate?....

{super delicious dark chocolate chips}

A whole lot of yum!

{yumminess}


However, when you happen to accidentally drop yummy dark chocolate chips on very nasty gross carpet, nothing yummy happens. You just lose the chocolate chips in the splotchy sea of brown.

Simplest Sketti Sauce

Lately I've been into simple comfort foods for dinner. My appetite runs the gamut of homemade mac and cheese to Caesar salad, and I'm not sure why, other than the fact that comfort foods are really tasty and usually a cinch to make. This no-fuss tomato sauce is both really tasty and really easy to make, making it something that I am capable of cooking these days.

The original recipe idea is from smittenkitchen, but comfort-food obsession or not, I have an issue with buttering vegetables or even just mixing butter with vegetables. Frankly I don't like to do it. Jeff however, loves butter, so I compromised and made a reduced-fat version that was still simply delicious.


Ingredients:
1 large (28 oz) can whole peeled tomatoes (I used unsalted)
2-3 Tbsp unsalted butter
1 medium sweet onion, peeled and cut in half
salt to taste

Method:
In a large saucepan, melt the butter, pour in the tomatoes and place the onion halves right in with the tomatoes and their juice. Bring to a simmer, then reduce heat to medium-low so sauce sits at a low simmer for around 45 minutes. Occasionally stir and crush tomatoes up against the side of the saucepan. When done, remove onions and salt to taste. Serve with noodles...and enjoy!

Making Pies

Say these words to the tune of the Patti Griffin song, "Making Pies" :)

And then get pie making! I've got some pie baking to do for Thanksgiving, namely some apple, more apple, and possibly a cherry. AND I have some reserved peach pie filling that my sister and I whipped up back in August when peaches abounded. Every time I open up my freezer I see it and I just think, oh peach pie...I'll be using it in the deep winter when some summer is needed, but for now, feast on these and dream of the over-eating, pants-tightening, food fest coming up in less than a week:

{peach pie, ready to cool}


{peach and apple pie, more to come on apple...}

So Cinch Applesauce

Oh the weekend was a relaxing one.

It snowed...winter now dusts the mountains. This is one of the times I love Utah best.

After class, I strolled through the Provo Library, just pulling interesting books off the (juvenille reading) shelf. I loved it. It felt so indulgent to just grab whatever caught my attention, and I felt like a little girl again in the days where I spent most every afternoon at the library.
With the snow-capped mountains around me and some light-reading in tow, I fixed myself a cup of tea, read, and waited for my Jeffrey to come home.
Saturday afternoon I wanted to do nothing other than bake. So I did. Then I dabbled in homework. Slowly but surely this simplest, homemade applesauce perfumed our home with the rustic smell of roasting apples.

{rome apples, peeled}

{apples, cored, peeled and ready to be grated}

{crockpot of apples ready to simmer}

So Cinch Applesauce

8 apples- I like to use Rome apples and sprinkle in a few Granny Smiths
1/2 C water
scant scant 1/2 C granulated sugar
cinnamon to taste (optional)

Peel and core apples, being sure to clear out all the core and seeds from the apples. Chop, rough chop, or grate your apples depending on your preference for super-chunky, chunky, or really not chunky at all (you can always put the applesauce in the blender if you'd like to smooth it out). Put the apples in the crockpot (we like to use crockpot liners-easy peasy clean-up for my honey), pour water and sugar and cinnamon over top the apples and mix. Cover, cook on "Low" for anywhere from 6-8 hours. If you cook it for over 10 hours, you could end up with apple butter, which is also delicious.
We like to let ours cool before we eat it, then we eat it a la carte, or on cottage cheese, or in oatmeal.

Stocking Up

My sister, Krista, teases me about this.

But I think it's wonderful so I am going to share. Here's how to make superbly delicious broth at no additional cost to your budget-a kind of broth that will jazz up your soups and knock your slippers off. And since it's getting colder and soups are sounding more and more like a good dinner idea, consider this a timely suggestion.

I call it "saving vegetable ends". I must admit this wasn't all my idea, it was a suggestion I found somewhere online at some time, but I implement the technique of saving veggie ends as I'm sure no one does. It's rather simple, really. Just whenever you are slicing and dicing vegetables, save the pieces you would normally throw away, put them in a large freezer bag, and stash them in the freezer. When the bag is full, it's time to make stock!

Some stashing tips:
Thoroughly wash all vegetables-you don't want dirt, etc. in your broth
Stash the onion skins! They give the broth a rich color and flavor
Stash unused fresh herbs! I had some leftover parsley that I threw in and it was delish
Stash chicken bones! I like to buy a rotisserie chicken every now and then, separate all the meat from the bones, and save the bones (some with bits of chicken and skin on too) to add to my broth. Bonus-rotisserie chickie makes delicious soups, salads, and wraps

The first time I made broth I let it simmer in my cast iron pot for about 2 hours. But I recently made some broth in the crock pot on the "Low" setting and let it cook for about 8 hours (I put all the veggies and things in, added about 8 cups of water and just a bit of salt, left for shcool, and when I came home it was ready). I think I like this method better, and I also think that next time I'll add 10 cups of water.
After cooking, I pour the veggies and broth through a large strainer, then again through a fine strainer which rids the broth of all the dregs and such. I then put it into a large jar. If I knew how to can things, I would definitely can this. Alas, I cannot (haha unintentional pun alert!!) so I just put a lid on and store it in my fridge. It never sits there long....delicious homemade soup calls my name....

Go ahead and try this! I promise you'll love it- even if your loved ones think you're a freezer-crazy, veggie stashing, frugal frump- it's so worth it.


jars of stock pic from elanaspantry.com

Old Favorites

One of my guilty pleasures is to stockpile recipes. I may have acquired this knack from my Mama, who has a conglomerate of old recipe books, recipe index cards, and recipes scribbled on scrap pieces of paper. However, one of my all time favorite foods generally needs no recipe card, it’s easy and quick to fix, and oh so satisfying. I am talking about oatmeal. Those warm, softened and slightly nutty oats combine their goodness with raisins and there you have it- my first food love. If you don’t believe me, there are multiple pictures of plump little Rachel munching up oatmeal with raisins, as if a child this large needed to munch anything:

Here are some variations of my old stand-by favorite:

Gingerbread Apple Oatmeal

Scant ¼ C. of homemade or homestyle applesauce (the homemade, or at least homestyle kind, is so hearty and is much more flavor rich than the store bought kind)

1 T. Gingerbread coffee creamer

2 packets of Splenda, or if you prefer, ½-1 tsp. Brown sugar

A bowl of your favorite oatmeal (I stud mine with raisins)

Mix all together and feel free to adjust to your taste preference. I love this oatmeal blend-it’s so flavorful and so surprisingly delicious.


Pear and Walnut Oatmeal

1 cored and sliced ripe pear (I like Bartlett pears)

1-2 T. walnuts (or pecans)

Sugar or sweetener to taste

1 T Half-and-Half

A bowl of your favorite oatmeal

Toast the walnuts at 400 Fahrenheit until just toasty. Mix together all ingredients. This recipe is so tasty because the pears soak up some of the warmth of the oatmeal and soften, and the nuts adds a joyful crunch.


Also, check out this chocolate chip cookie oatmeal recipe, this recipe for cherry and tangerine oatmeal, and these pumpkin pie oatmeal and simple pumpkin oatmeal recipes.